About this product
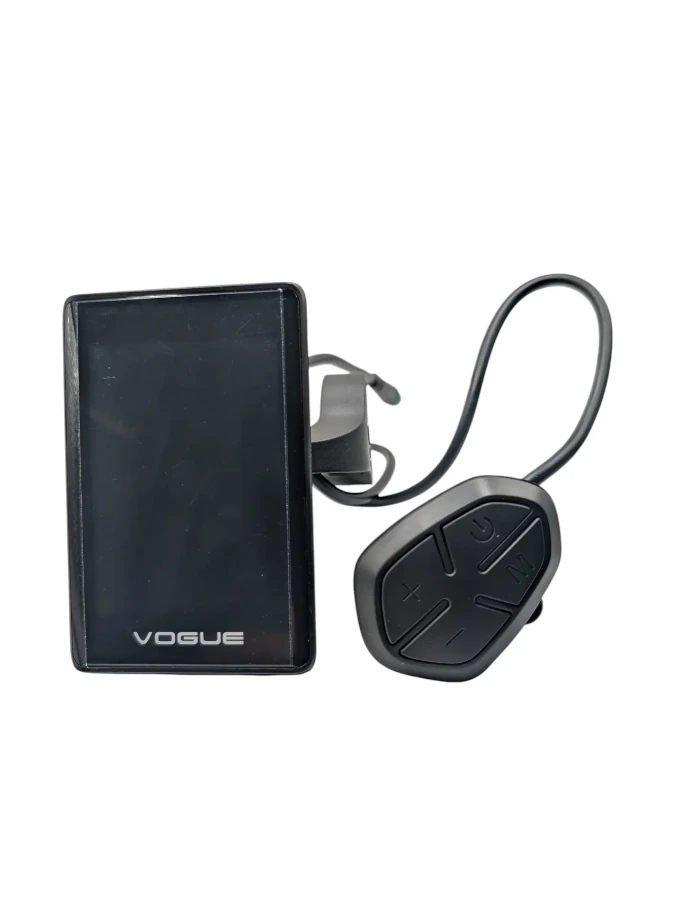
The UKS2 (55519) is the centrally mounted LCD display on various Vogue e-bikes — including the Premium, Comfort, and Mestengo models. The display shows your speed, battery charge, support level, and odometer, has a USB charging port, and a comprehensive settings menu. In this manual, you will read how to operate it, adjust all settings, and what to do in case of an error message. Need a part or assistance? We deliver from stock.
Buy now Become a service partner
Specifications
| Screen | LCD, 5 brightness levels |
| Power | 24 / 36 / 48 / 60 / 72 V (adjustable in menu) |
| USB charging port | DC 5V / 500 mA |
| Assistance levels | Up to 9, adjustable (3 / 5 / 6 / 9) |
| Speed display | Real-time (RT), average (AVG), and maximum (MAX) |
| Odometer | Trip (TRIP), total (ODO), and ride time (TIME) |
| Wheel size | 16 – 32 inches (including 700C) |
| Software | To be updated via UART |
The buttons
The UKS2 has four buttons: Power (on/off, save), Plus (up), Min (down) and Mode (M) (switching between displays and opening the menu).
Operation
Power on/off
Press and hold Power for 1 second. Without use or riding, the display automatically turns off after 5 minutes (adjustable).
Daily use
- Assistance level: press briefly on Plus or Min. Level 0 is neutral; 1 to 9 is increasing support (default 1 when turned on).
- Switch odometer: Press briefly on Power — TIME → ODO → POW → TRIP.
- Switch speed mode: Press briefly on Mode (M) — RT → AVG → MAX.
- Headlight + day/night: hold Plus for 1 second (controller support needed).
- Walk mode 6 km/h: hold Minus for 2 seconds; a P will appear. Releasing stops the mode.
- USB charger: Press and hold Mode (M) for 1 second to turn the USB port on/off (DC 5V / 500 mA).
- Clear trip data: Press and hold Plus and Minus together for 1 second (clears MAX, AVG, TRIP, and TIME).
Settings
Open the menu by pressing Mode (M) twice quickly (within 0.3 s). Save with Power; exit the menu with two presses of Mode. The menu closes after 30 seconds of inactivity and cannot be opened while riding (speed greater than 0).
| Item | Setting | Options / value |
|---|---|---|
| P1 | Brightness | Level 1 (darkest) to 5 (lightest) |
| P2 | Automatic shutdown | 1 – 9 minutes, or OFF |
| P3 | Unit | 0 = km/h · 1 = mph |
| P4 | Switching | 0 = manual · 1 = automatic |
Advanced settings
Open the advanced menu (ADS) and enter the password with Plus/Minus; confirm with Mode (M). Default password: 1801. In case of an error, "Err" will appear.
| Item | Parameter | Range / option |
|---|---|---|
| A1 | Voltage | 24 / 36 / 48 / 60 / 72 V, or UBE (user set) |
| A2 | Number of assistance levels | 3 / 5 / 6 / 9 |
| A3 | Speed limit | Adjustable (default 25 km/h) |
| A4 | Current limit | Adjustable (default 15 A) |
| A5 | Wheel size | 16 – 32 inches, incl. 700C |
| A6 | Speed measurement magnets | 1 – 72 |
| A7 | PAS magnets | 3 – 15 |
| A8 | 6 km switch (push assist/throttle) | Positions 0 – 3 |
| A9 | PAS orientation | Direction of rotation of the sensor |
Note: increasing the maximum speed on public roads is not allowed and voids insurance and type approval. Speed and power are also limited by the motor and controller. Only adjust this within legal frameworks.
Wheel size = correct speed. An incorrect wheel size gives an incorrect speed display.
Error messages
In case of a malfunction, the UKS2 displays an error icon with a code on the speed position. Below are the codes with meaning and solution.
| Code | Description | Solution |
|---|---|---|
| 0x21 | Power failure | Internal controller defective — replace the controller. |
| 0x22 | Throttle handle failure | Check the throttle cable and connector; check if the throttle return spring fully returns. |
| 0x23 | Motor phase failure | Check if the three motor phase wires are securely connected; replace the motor if the wiring is intact. |
| 0x24 | Hall sensor failure (motor) | Check the Hall wires for short circuits and if the connectors are securely attached. |
| 0x25 | Brake failure | Check the brake lever for short circuits, incorrect resting position, or a defect. |
| 0x30 | Communication failure | 1. Check if the communication protocol matches the controller. 2. Check for cable breaks, loose plugs, and the waterproof pins of the display. 3. Disconnect the PAS sensor; if the error code disappears, then the PAS sensor is defective. 4. Disconnect the speed sensor; if the error code disappears, then it is defective. 5. Disconnect the throttle; if the error code disappears, then the throttle is defective. 6. Disconnect the Hall wires from the motor; if the error code disappears, then the Hall sensors are defective. 7. Nothing works? Replace the controller or the display. |
Connections
| Color | Function |
|---|---|
| Red | Plus / battery power (24 / 36 / 48 V) |
| Blue | Controller lock cable |
| Black | Ground (GND) |
| Green | RXD — display receives signal from the controller |
| Yellow | TXD — display sends signal to the controller |
Do not scroll randomly through the menu when setting — you may inadvertently change software settings that cause the e-bike to no longer support properly. In doubt? Ask your dealer or our technical service for advice. Pay attention to the correct tightening moment during assembly; the clips fit handlebar sizes 31.8 / 25.4 / 22.2 mm.
Battery & charging
The battery has a lock on the side. Lock the battery before you ride and remove the keys. Charging can be done on the e-bike or disconnected at home; check the charge via the lights on the battery.
- Always use the supplied charger.
- Charge fully once before first use (light turns green).
- After fully charging, charging stops automatically after 24 hours.
- Do not let the battery discharge deeply — this voids the warranty.
- Charging does not work below about 0 °C or above about 45 °C.
- Winter storage: store at room temperature and recharge at least once a month.
Can't figure it out?
Our technical service will assist you directly with diagnosis and the right parts.
 Quality
 Service
 Availability