About this part
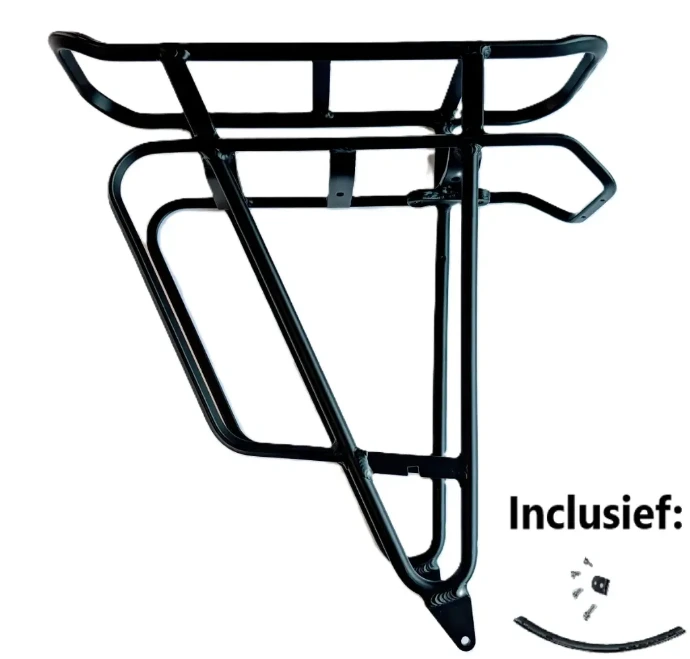
This 27 kg luggage carrier with battery slide is intended as a replacement for wear or defect. Check before installation if the luggage carrier is suitable for the bike.
Note
Perform this action with the bike stable in a mounting stand. Check if the current luggage carrier is correctly adjusted according to standard OBD0604023: the carrier with battery slide must til slightly forward (1–3°). If this is not correct, adjust the installation so that the new carrier is correctly positioned.
Important — first check compatibility
Deze bagagedrager is uitsluitend geschikt voor fietsen met een bevestigingspunt waarbij de bout van onderaf, via het spatbord, bij het ringslot wordt gemonteerd.
Parts & Tools
Check before starting if all parts are present. Parts set O.B. art. 51491 contains the following:
Benodigd gereedschap:
Screws Overview
Quick check so that you end up with exactly 4× M5 and 1× M6 processed.
| Position | Bolt | Quantity | Step |
|---|---|---|---|
| Fender strip + bracket at the front of the carrier | M5 | 2× | Install, step 1 |
| Bracket + fender to frame at ring lock | M5 | 1× | Install, step 2 |
| L-bracket from under the fender | M5 | 1× | Install, step 2 |
| Through L-bracket in the frame | M6 | 1× | Install, step 2 |
| Total | M5 / M6 | 4× / 1× | — |
1x Luggage carrier
4x M5 bolt
1x M6 bolt
1x Fender mounting strip
1x L-bracket (mounting at the lock)
Basic workshop tools
Awl
Fender punch or drill (6.5 mm HSS drill)
Preparation
Remove the existing parts so you have free access to the luggage carrier and the fender.
1. Remove the battery tray
- Open the controller box: carefully open the housing, disconnect all wiring, and remove the controller.
- Unscrew the battery tray from the luggage carrier and set it aside for reuse.
2. Remove the fender protectors
- Remove both fender protectors for full access to the luggage carrier.
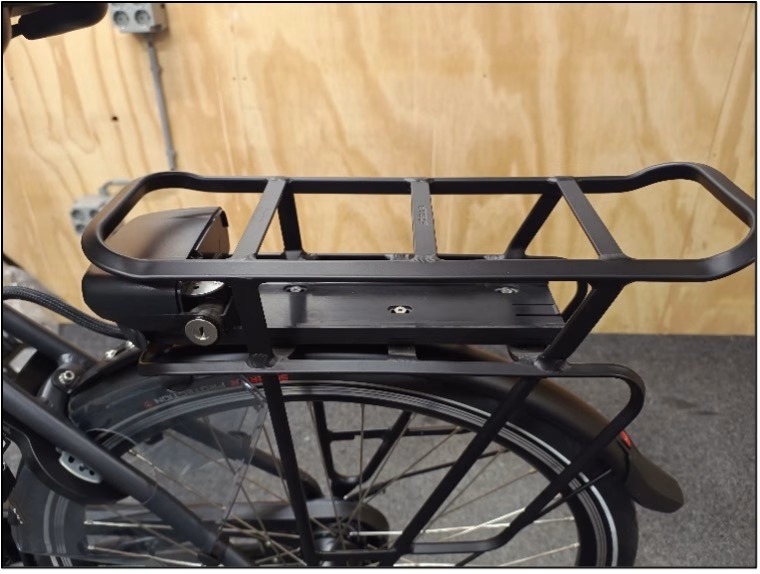
3. Mark the position of the old carrier
- Stick a piece of tape on both sides, at the front of the luggage carrier, on the fender. This way you maintain the correct position when placing the new carrier.
4. Remove the old luggage carrier
- Unscrew the luggage carrier and take it off the bike.
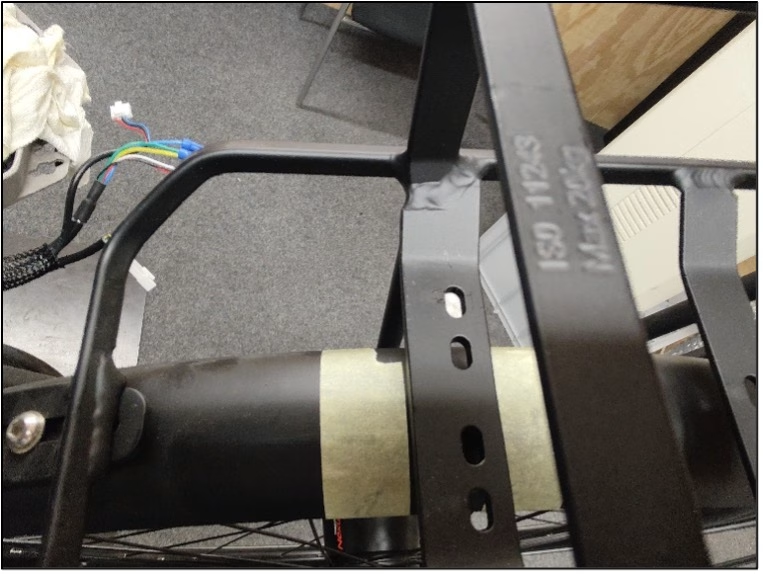
Marking & drilling the fender
Determine and make the mounting holes in the fender for the new carrier and the bracket at the lock.
1. Temporarily place the new carrier and mark the holes
- Attach the carrier with the two lower bolts. Make sure the front is exactly between the previously placed pieces of tape .
- Mark the position of the mounting holes in the fender with a awl or marker.
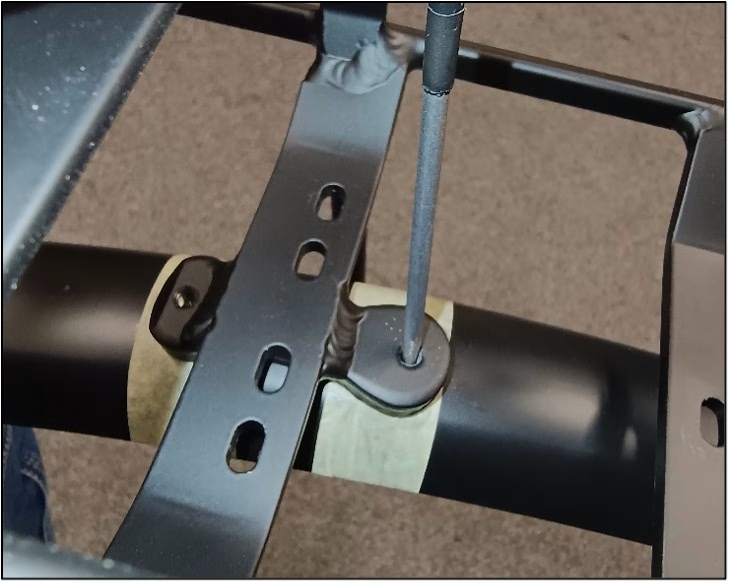
2. Determine the bracket position at the lock
- Stick a piece of tape on the fender at the level of the ring lock.
- Place the small L-bracket on the rear fender in the correct position and mark on the tape the hole where the bracket goes through the fender.
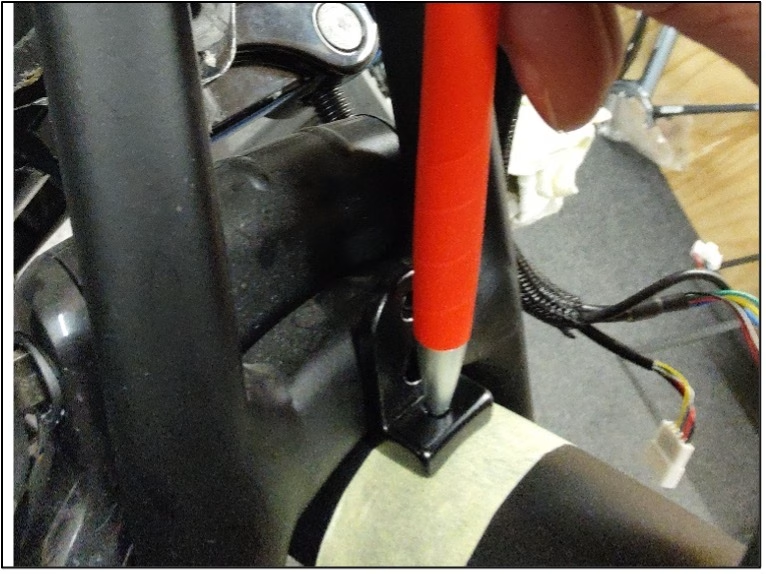
3. Make the hole at the lock
- Remove the rear wheel to access the fender properly.
- Unscrew the existing bolt that secures the fender at the ring lock.
- Create the marked hole with a fender punch or drill with a 6.5 mm HSS drill.
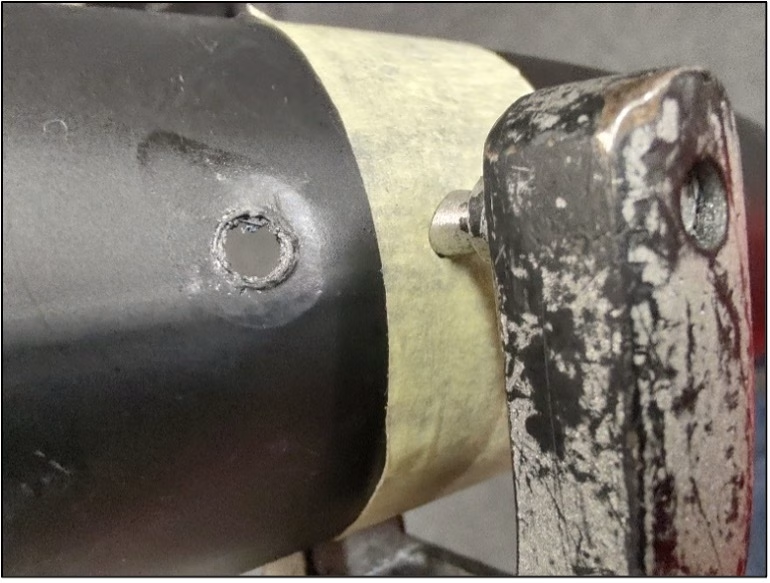
4. Check the alignment
- Compare the marked holes with the 4 holes in the strip on the inside of the fender.
- Does it not align? Move the carrier slightly forward so that the holes align neatly.

5. Drill the fender holes
- Create neat, round holes at the marked positions with the fender punch (or 6.5 mm HSS drill) that align well with the strip.
- Then remove all pieces of tape from the fender.

Note Work carefully when punching/drilling to avoid damaging the fender.
Mounting the luggage carrier
1. Attach the carrier and the strip
- Mount the carrier at the bottom at the rear mounting points of the frame with the supplied bolts.
- Place the L-bracket on the drilled hole at the lock and attach the fender strip and bracket to the front of the carrier. 2× M5

2. Secure the bracket at the lock
- Secure the bracket together with the fender to the frame at the ring lock. 1× M5
- Mount the L-bracket from underneath the fender. 1× M5
- Insert the M6 bolt through the L-bracket and tighten it into the frame. 1× M6
Final check confirmation Check that all bolts of the luggage carrier and the fender are securely tightened.
Final assembly & check
1. Mount and connect the battery tray
- Attach the battery tray to the new luggage carrier.
- Connect the wiring correctly to the controller according to the color or plug coding and check all connections.
- Replace the cover on the controller box and secure it properly.
2. Mount the rear wheel
- Reinstall the rear wheel, including all accessories (chain, brake, and gear).
3. Mount quick releases and fender protectors
- Reattach the quick releases at the usual attachment points and mount the fender protectors.
Can't figure it out?
Our technical support team will immediately assist you with troubleshooting and finding the right parts.
 Quality
 Service
 Availability